
How to get started using MCP servers
A very practical setup guide for using Zapier MCP 2.0 and other MCP servers with Anthropic's Claude

The best way to get started with the Model Context Protocol, if you haven’t already, is to try out using an MCP server!
While MCP server setup is not without its hiccups, this post will go step by step through two options for how you can get started using MCP servers today, in particular Zapier’s new MCP Server 2.0. So let’s get started!
Option 1: Anthropic Team/Max Plan
Limited setup, but more expensive
Right now, Anthropic offers beta support for “Integrations” (aka MCP servers) for its Team and Max plans, where Max is priced at $100/month. They’ve promised that support in the Pro plan ($20/month) is coming soon!
While this is expensive, it’s the easiest way to try out MCP servers today if you’re willing to make the investment. Once you upgrade, all you have to do to start using an MCP server is:
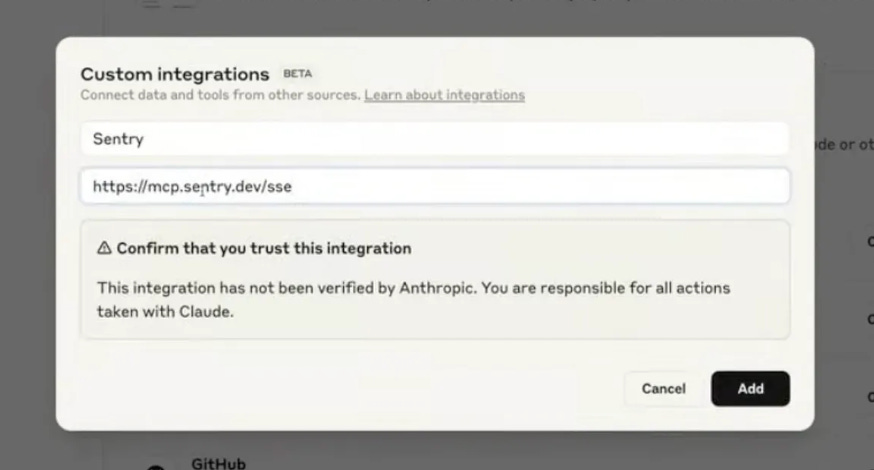
Click ‘add more’ and then add your MCP server’s name and URL.
If you haven’t yet picked out an MCP server to install, now is the time!
Scroll down for instructions on how to get an MCP server URL for Zapier (an all-in-one tool), or pick from Anthropic’s list of pre-vetted tools here.
You should now see your newly-added MCP server listed under ‘Integrations’:

Now, start a new chat and ask Claude to do something that relates to the tools you chose!
E.g.: “Create a draft gmail message to hi@mcpincontext.com telling them how I successfully installed an MCP server and am excited to try it out!”.
Claude should ask your permission to use the new tool, and create a draft email for you.

Option 2: Claude Desktop
Some setup, but free
Even if you don’t pay for an Anthropic plan, you can still use MCP servers in Claude Desktop; it just requires a bit more setup.
First, download Claude Desktop if you haven’t already.
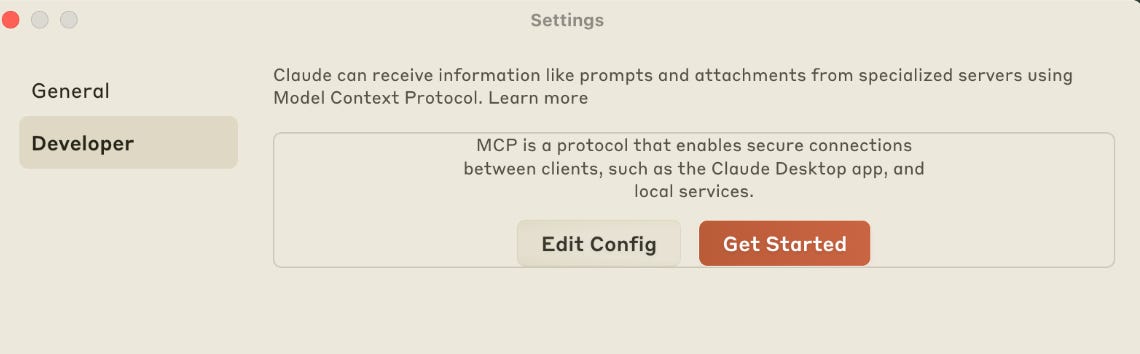
Go into your Claude Settings:

Under “Developer”, click “Edit Config”:

Once you have MCP servers installed, that same page will list those:

Now, let’s make sure you have two pieces of software called
Nodeandnpminstalled. First, open your Terminal (MacOS) or Powershell/Git Bash (Windows), type this command, then press enter to see if you have Node installed already:


node --versionIf you don’t have node installed yet, you have two options to install it.
Install it directly from nodejs.org (least technical)
If you already have something like Homebrew installed, you can use the command line and type:
brew install node Back in Claude Desktop, click ‘
Edit Config’ and then open the file calledclaude_desktop_config.json. I recommend doing “Open With TextEdit” if you’re on a Mac to avoid using XCode.

If this is your first ever MCP server, delete everything in the file, and replace it with the code snippet below, updating “username” to your username. This will install the Filesystem MCP server, which lets Claude read from and create new files in your Desktop and Downloads folders.
If you don’t know your username, go back to your terminal and type
pwd, then press enter. This will show you the right username to use!
{
  "mcpServers": {
    "filesystem": {
      "command": "npx",
      "args": [
        "-y",
        "@modelcontextprotocol/server-filesystem",
        "/Users/username/Desktop",
        "/Users/username/Downloads"
      ]
    }
  }
}
To add other MCP servers, you add them within the curly brackets for “mcpServers”:{}, separated by commas. For example, here’s what it might look like once you have a few MCP servers set up:
{
  "mcpServers": {
    "filesystem": {
      "command": "npx",
      "args": [
        "-y",
        "@modelcontextprotocol/server-filesystem",
        "/Users/mbcrosier/Desktop",
        "/Users/mbcrosier/Downloads"
      ]
    },
    "canvas": {
      "command": "node",
      "args": [
        "/Users/mbcrosier/Projects/canvas-mcp/src/index.ts"
      ],
      "env": {
        "CANVAS_API_TOKEN": "redacted",
        "CANVAS_DOMAIN": "schooldomain.instructure.com"
      }
    },
    "zapier-mcp": {
          "command": "npx",
          "args": [
            "mcp-remote",
            "https://mcp.zapier.com/api/mcp/s/redacted/sse"
          ]
    }
  }
}
Once you edit your config file, save and close it. Then, restart Claude Desktop. When you reopen, your MCP servers should be visible and ready for you to use. You can try asking something like “search my downloads for…” to invoke the Filesystem MCP server, specifically.

If you don’t know which MCP servers you want to try next, I highly recommend Zapier, and will include instructions below for how to get started with their MCP server. More on that below!
Setting up Zapier’s MCP Server
Zapier is an automation platform that offers ‘connectors’ to lots of different apps, so the Zapier MCP Server is a bit of a cheat code; installing the Zapier MCP Server can allow you to access data and ‘tools’ from lots of different apps without too much additional setup.
First, visit the Zapier MCP landing page and click ‘Get started.’ You’ll need to create an account if you haven’t already:
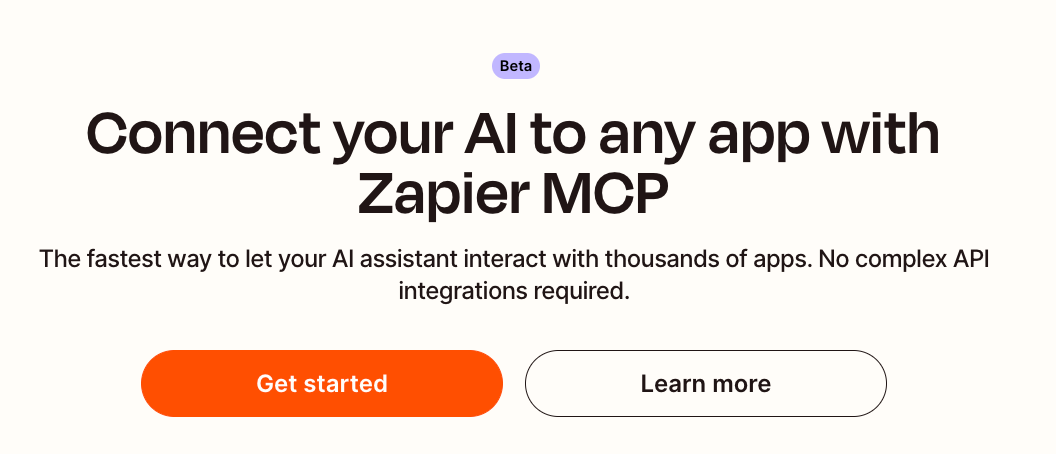
This will take you to the MCP setup tool.
If you did Option 1 (Team/Max), select ‘Claude’ as your MCP Client.
If you did Option 2 (Claude Desktop), select ‘Other’ as your MCP Client.
Next, add a new tool!

The specifics here are up to you depending on how you use AI. One thing I often do with AI is draft emails, so I chose to add tools related to finding and drafting emails. Zapier has truly hundreds of integrations, so you have lots of options:

Once you’ve added some tools, switch over to the ‘Connect’ tab.
With Option 1
For Option 1, the Anthropic Team/Max plan, your URL should look like this:

Copy and paste that right into the Claude.ai integrations tab, just like this:
With Option 2
For Option 2, Claude Desktop on the free plan, you’ll want the server-specific URL:

Copy/paste it, and then add it to your JSON config file using this format:
{
  "mcpServers": {
    "filesystem": {
      "command": "npx",
      "args": [
        "-y",
        "@modelcontextprotocol/server-filesystem",
        "/Users/username/Desktop",
        "/Users/username/Downloads"
      ]
    },
    "zapier-mcp": {
          "command": "npx",
          "args": [
            "mcp-remote",
            "https://mcp.zapier.com/api/mcp/s/yourtoken/sse"
          ]
    }
  }
}
One thing you may notice is that the URL ends with “SSE.” That stands for server-sent events, and is your clue that this MCP server works “remotely” (as opposed to some MCP servers, which only work ‘locally,’ e.g. with Desktop apps). This means you can use it in Claude.ai, as well as in the Desktop app.
Working with Local MCP Servers
If you set up Option 2 (Claude Desktop), you can also configure local MCP servers. For this, I recommend finding MCP servers using a registry like PulseMCP or Smithery, then following the tool-specific instructions on their GitHub page.
Typically this involves having git set up on your computer, so that you can git clone the repository, install dependencies, and then add it to your config file.
I’m always happy & excited to help folks get started using MCP servers, which I know isn’t always easy. If you encounter any challenges, I’m happy to help — just reach out at hi@mcpincontext.com and I’ll do my best to help!
Very nice insights. Totally worth it for someone trying to get started with MCPs.