
How to build & deploy a personal MCP server using AI: a step-by-step guide
How MCP servers could transform professional research, and how to vibe-code your own personal MCP server using Cloudflare and AI tools

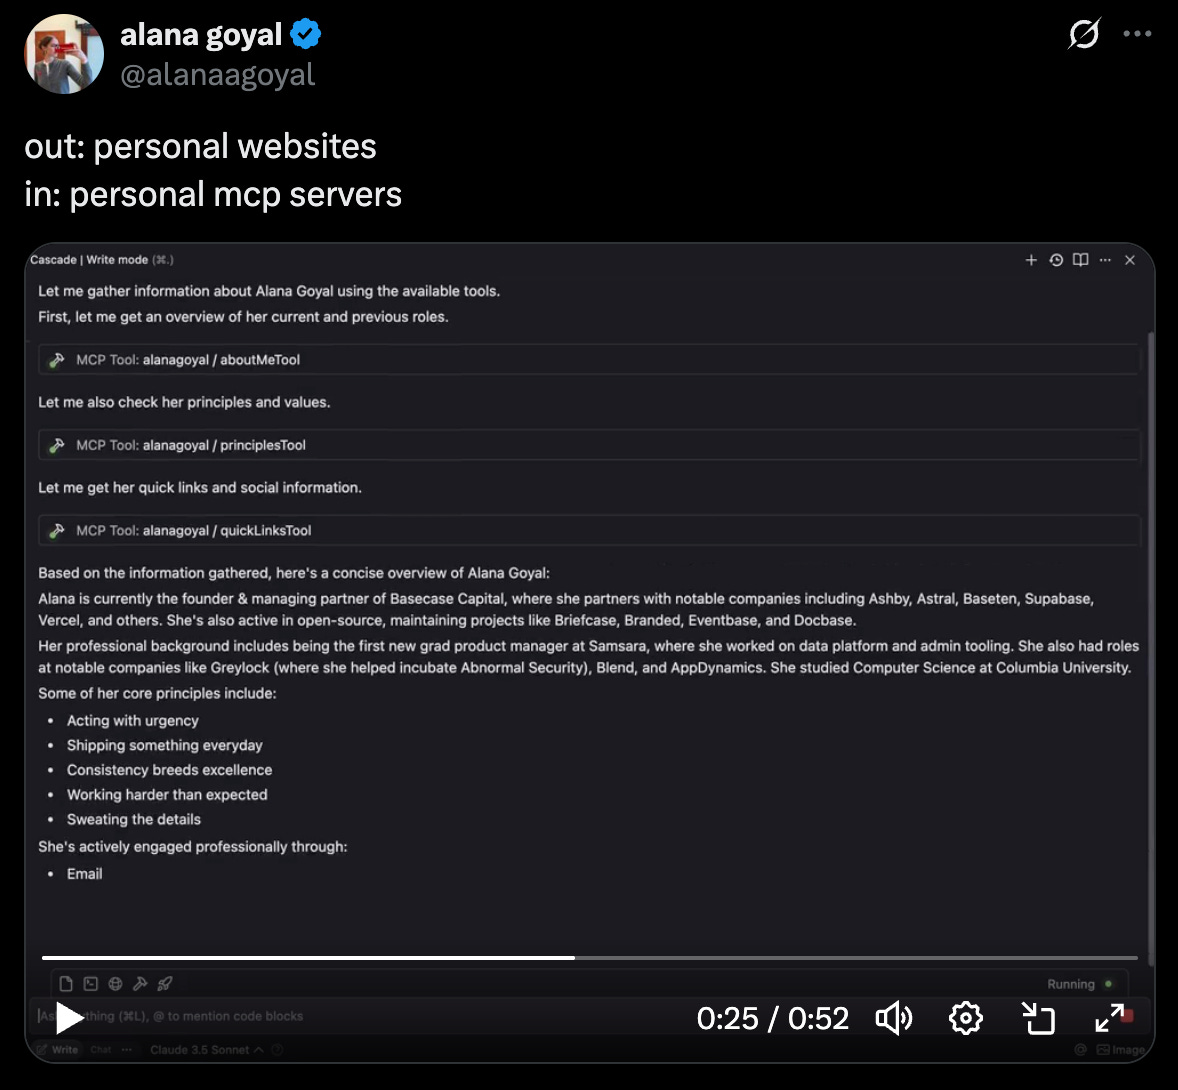
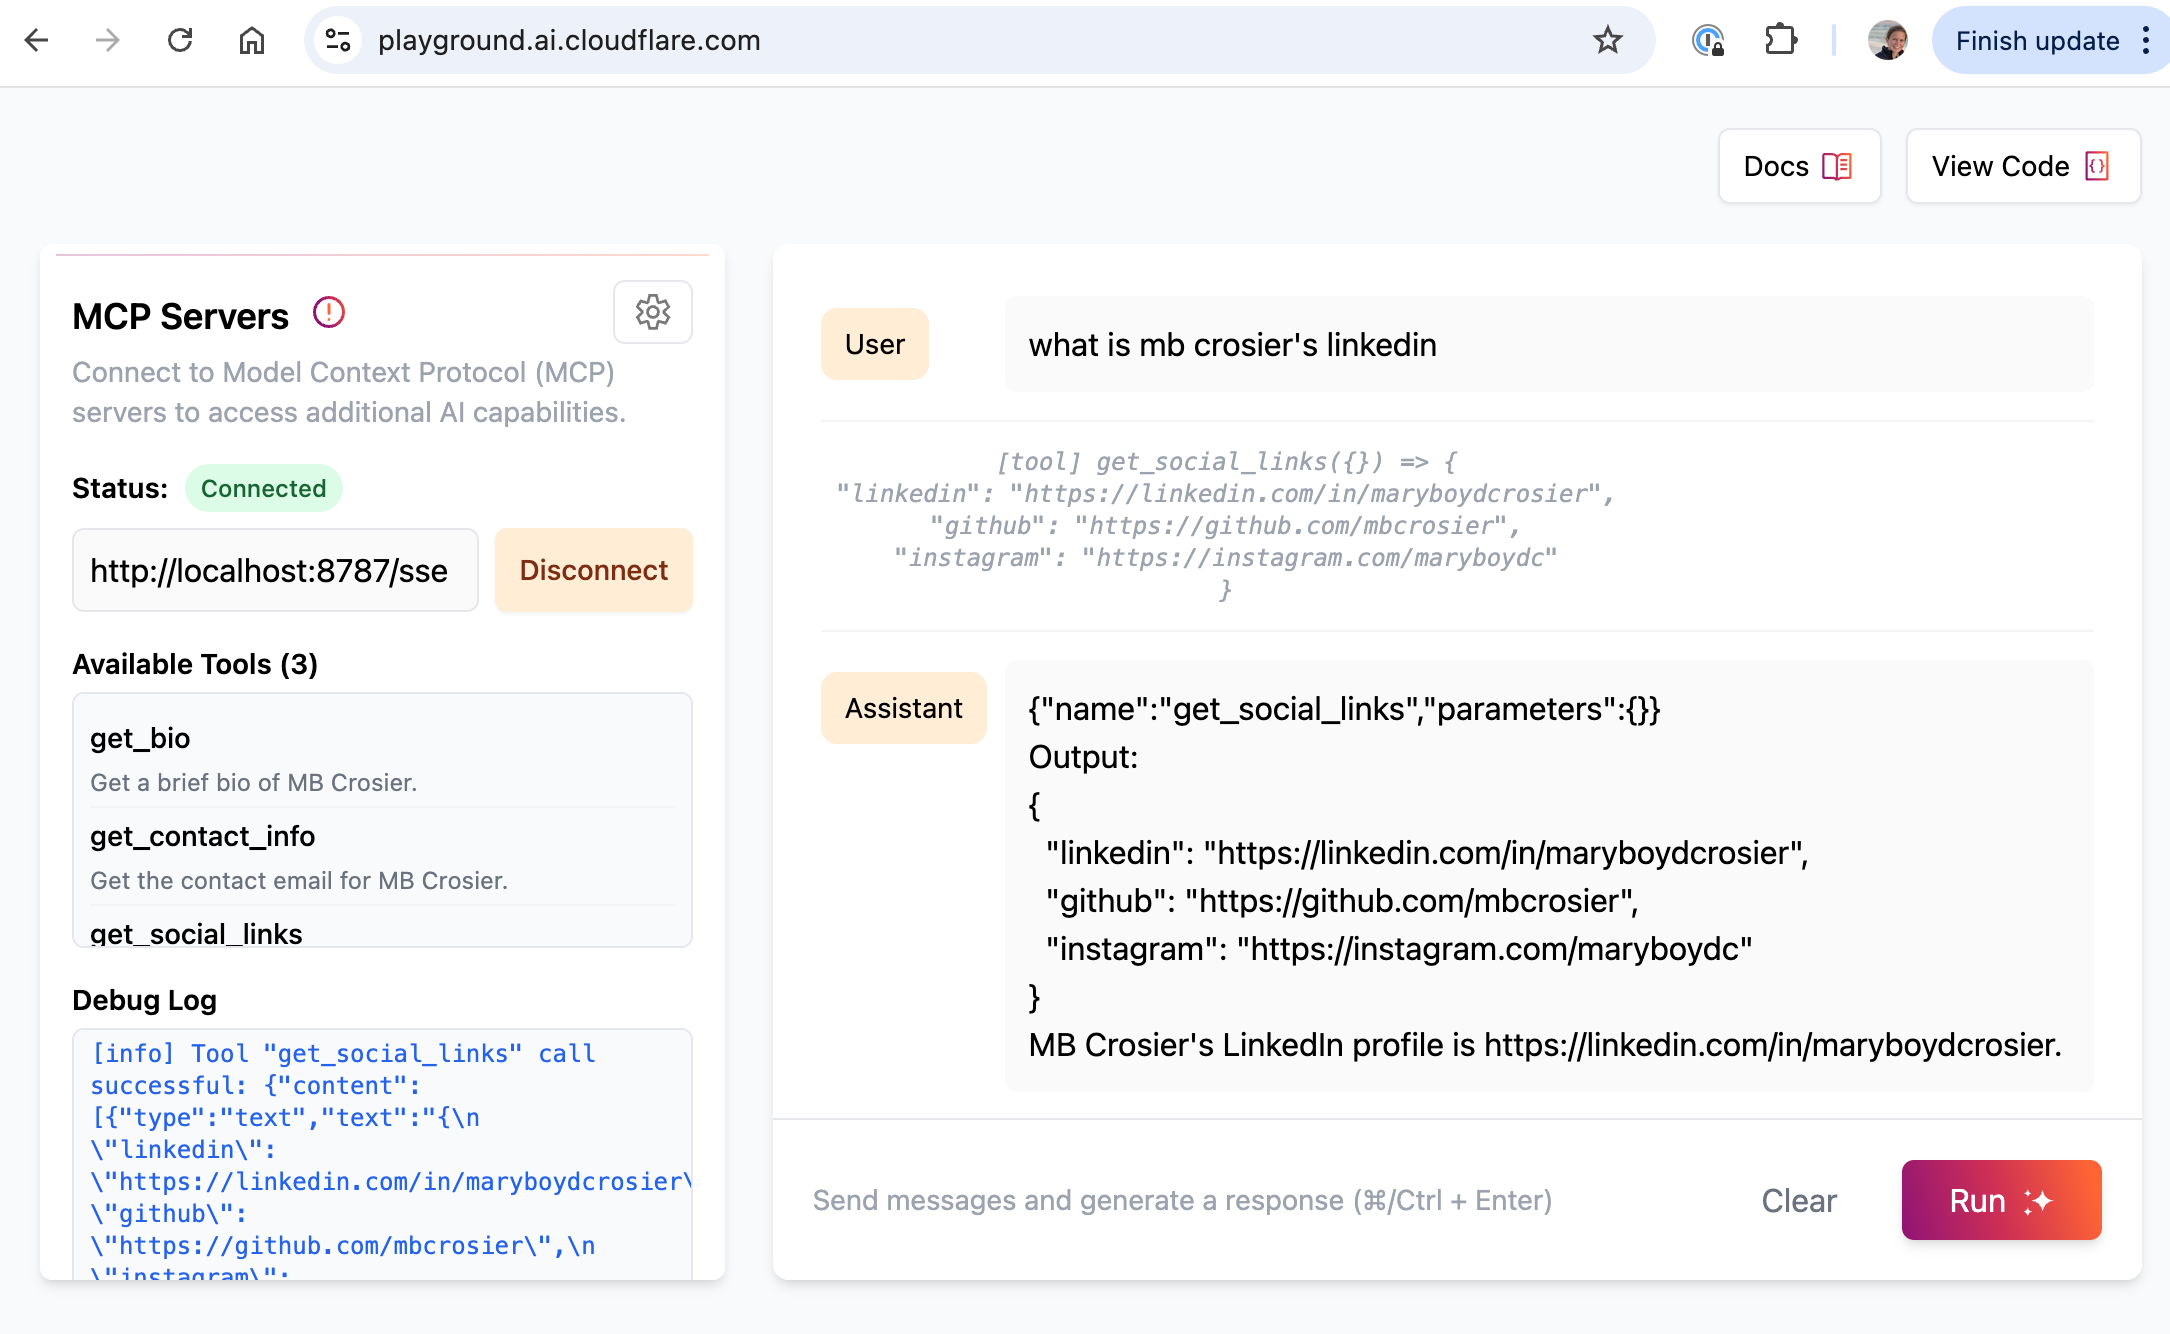
A fun and interesting trend that I’ve been seeing more and more recently is the creation of personal MCP servers. These act almost like an interactive resume, with tools like “get_bio” or “get_contact_info” — an MCV, of sorts :)
The first example I saw was this one from Alana Goyal, but there are lots of examples out there!
Why create an personal MCP server?
Personal MCP servers are interesting because, today, they’re not particularly useful: most recruiters don’t know what MCP is, and would much rather look at your LinkedIn.
But you can also imagine a world where they would be quite useful. Instead of reading through someone’s LinkedIn yourself, or copy/pasting from it into a chatbot, you could just add their personal MCP server to your AI tool. Then, when you ask the AI questions about the candidate, the MCP server can provide relevant information in a structured format — more targeted, less risk of hallucination.
Another great thing about personal MCP servers is that they’re fairly simple to create, so they make a great first project for anyone looking to get started creating their own MCP servers.
I recently vibe-coded my own personal MCP server, and wrote down all the steps for anyone who wants to try it out!
How to vibe-code your own personal MCP server using Cloudflare
Pre-reqs: GitHub account, Cloudflare account, Git, and an AI-enabled IDE/code editor of your choice (like Cursor or Windsurf)
After you install or get set up with the pre-reqs, visit this link:
This will create a new remote MCP server for you, deployed via Cloudflare.
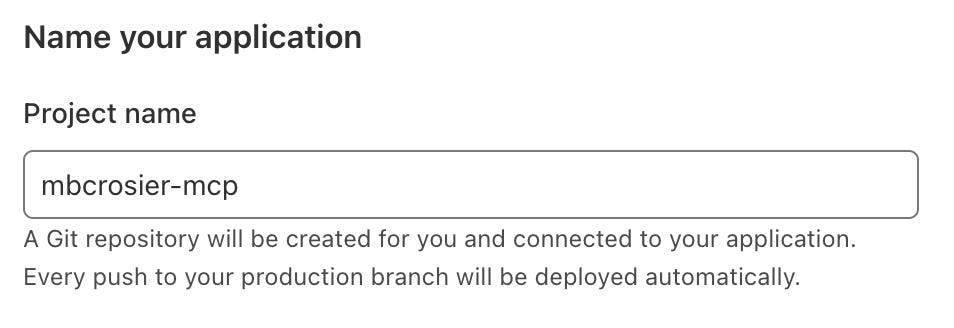
After the page loads, you’ll see a pop-up window. Make sure you connect your GitHub, and change the name of your MCP server to something more descriptive than the template default, like your name:
Awesome! Your MCP server is already deploying (basically, launching on the internet so people can access it), but it only includes the default tools. You want to personalize it to be specific to you.
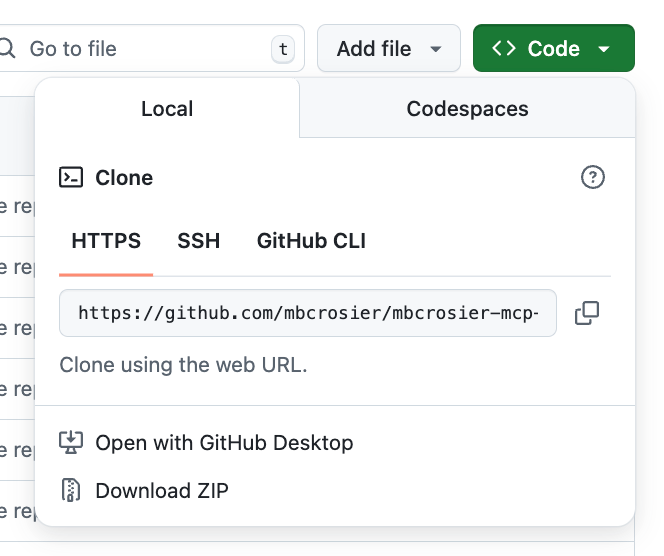
Given that, now hop over to GitHub, either directly or by following the popup after you ‘Continue to project’. Cloudflare should have created a new repository for you:

In your new repository, click “Code” and then copy the link to your repository. I typically use HTTPs, but any method works:

Next, open your computer’s terminal. Switch into a folder where you store GitHub projects. If you’ve never done this before, here are a few helpful git commands:
ls— see a list of files and folders available in your current directorycd ..- go ‘up’/out a foldercd FolderName- move into a different directory/folder, e..g.:

cd ProjectsOnce you’re in the folder you want, type “git clone” and then your copied link, e.g.:
git clone https://github.com/mbcrosier/mbcrosier-mcp-server.git
If you’ve never worked with git before, you may also need to connect git to GitHub for this to work.
Finally, I would go ahead and switch into that folder to install existing dependencies, e.g.:
cd <your-folder-name>
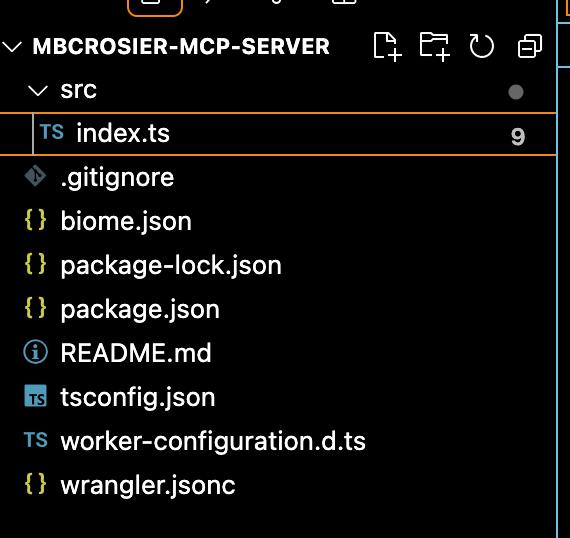
npm installNow, you should have a copy of your project on your local computer, which means you open it and see all the files in an IDE of your choice. I usually use Cursor. Here’s what the project structure looks like with just the unedited template:
Now, it’s time for the fun part: designing your personal MCP server! You’ll need to decide what ‘tools’ you want to include. Here are some examples that each have slightly different tools.
Once you have a plan in mind, I recommend creating a new branch before editing your MCP server directly. You can do this by opening a terminal window within your IDE and typing:
git statusThis tells you what branch you’re on. You should be on main by default!
git checkout -b your-new-branch-nameIf you want to confirm that this worked, you can then again type:
git statusWhich will show that your new branch is highlighted green, rather than main. You’re ready to start making changes!
I personally used Cursor’s Agent tool to make most of the updates to my personal MCP server for me. Here was my prompt:
Modify this MCP Server to return information about me, <your name>. Remove the existing tools, and add three new tools: get_bio, get_contact_info, and get_social_links. Include relevant descriptions for each MCP tool that will be surfaced in the client app. Use the format that is appropriate for a MCP created using the Cloudflare Typescript template for a Cloudflare Worker.
Get bio should return a paragraph bio of <your name>.
Get_contact_info should return my email, <your email>.
Get_social_links should return my Linkedin, Github, and Instagram accounts.
Please also write a completely new README. This new README should explain that this is a personal MCP server that shares info about me for use with LLMs. Include in the README:
Descriptions of each of the tools
Instructions for how to try out the MCP server in Cloudflare playground; and
Instructions on how to use the MCP server in Claude Desktop.
My MCP server will be deployed at <https://where-you-deployed-it.yourname.workers.dev/sse>
After the new tools were created, I went through and edited the code to include the correct bio and links, but you could also put those into the prompt if you prefer.
One other step I took which isn’t necessary, but is nice, is to add a custom landing page for your MCP server when the link is visited in a browser.That way, when an MCP client visits my personal MCP server, they’ll get programmatic access to the relevant tools. But when a human visits the link, they’re able to see more info about the MCP in a nice human readable format. Here’s a prompt for that part:
I want the /sse path to behave differently based on the client. If the request is from a web browser, please serve a custom HTML landing page. For all other requests to /sse (which will be from MCP clients sending POST requests to /sse/message), please route these to the MCP server handler, likely MyMCP.serveSSE('/sse') as used in the original code for MCP communication.
This HTML-page should include a human-friendly, nicely formatted summary of my MCP server and tools, using content adapted from the README.
Commit your changes! First, open the terminal in your IDE, and then use
git addto stage (prepare) your edited files. You can select specific files by name, or usegit add .to select everything that has changed.
git addNext, make a commit, with a relevant commit message, e.g.:
git commit -m "Updating MCP tools for my personal resume"Now, test that your MCP server does what you want it to do. A good way to test this is to run it locally and confirm that it works how you want it to. In your terminal, type this:
npm run devThis will start to run a local ‘development’ version of your MCP server, which you can view by typing this into your browser: http://localhost:8787/sse.
You can also test it out by copying that link into Cloudflare’s AI Playground:
Finally, push this to GitHub, substituting in the name of your branch:
git push origin yourbranchnameFrom there, you can merge your pull request to pass your updates through to GitHub. This will also update your Cloudflare deployment, so the active version of your MCP server will automatically refresh after a few minutes, and you’ll be ready to try it out!
Here’s what that looks like in Claude Desktop, for example:
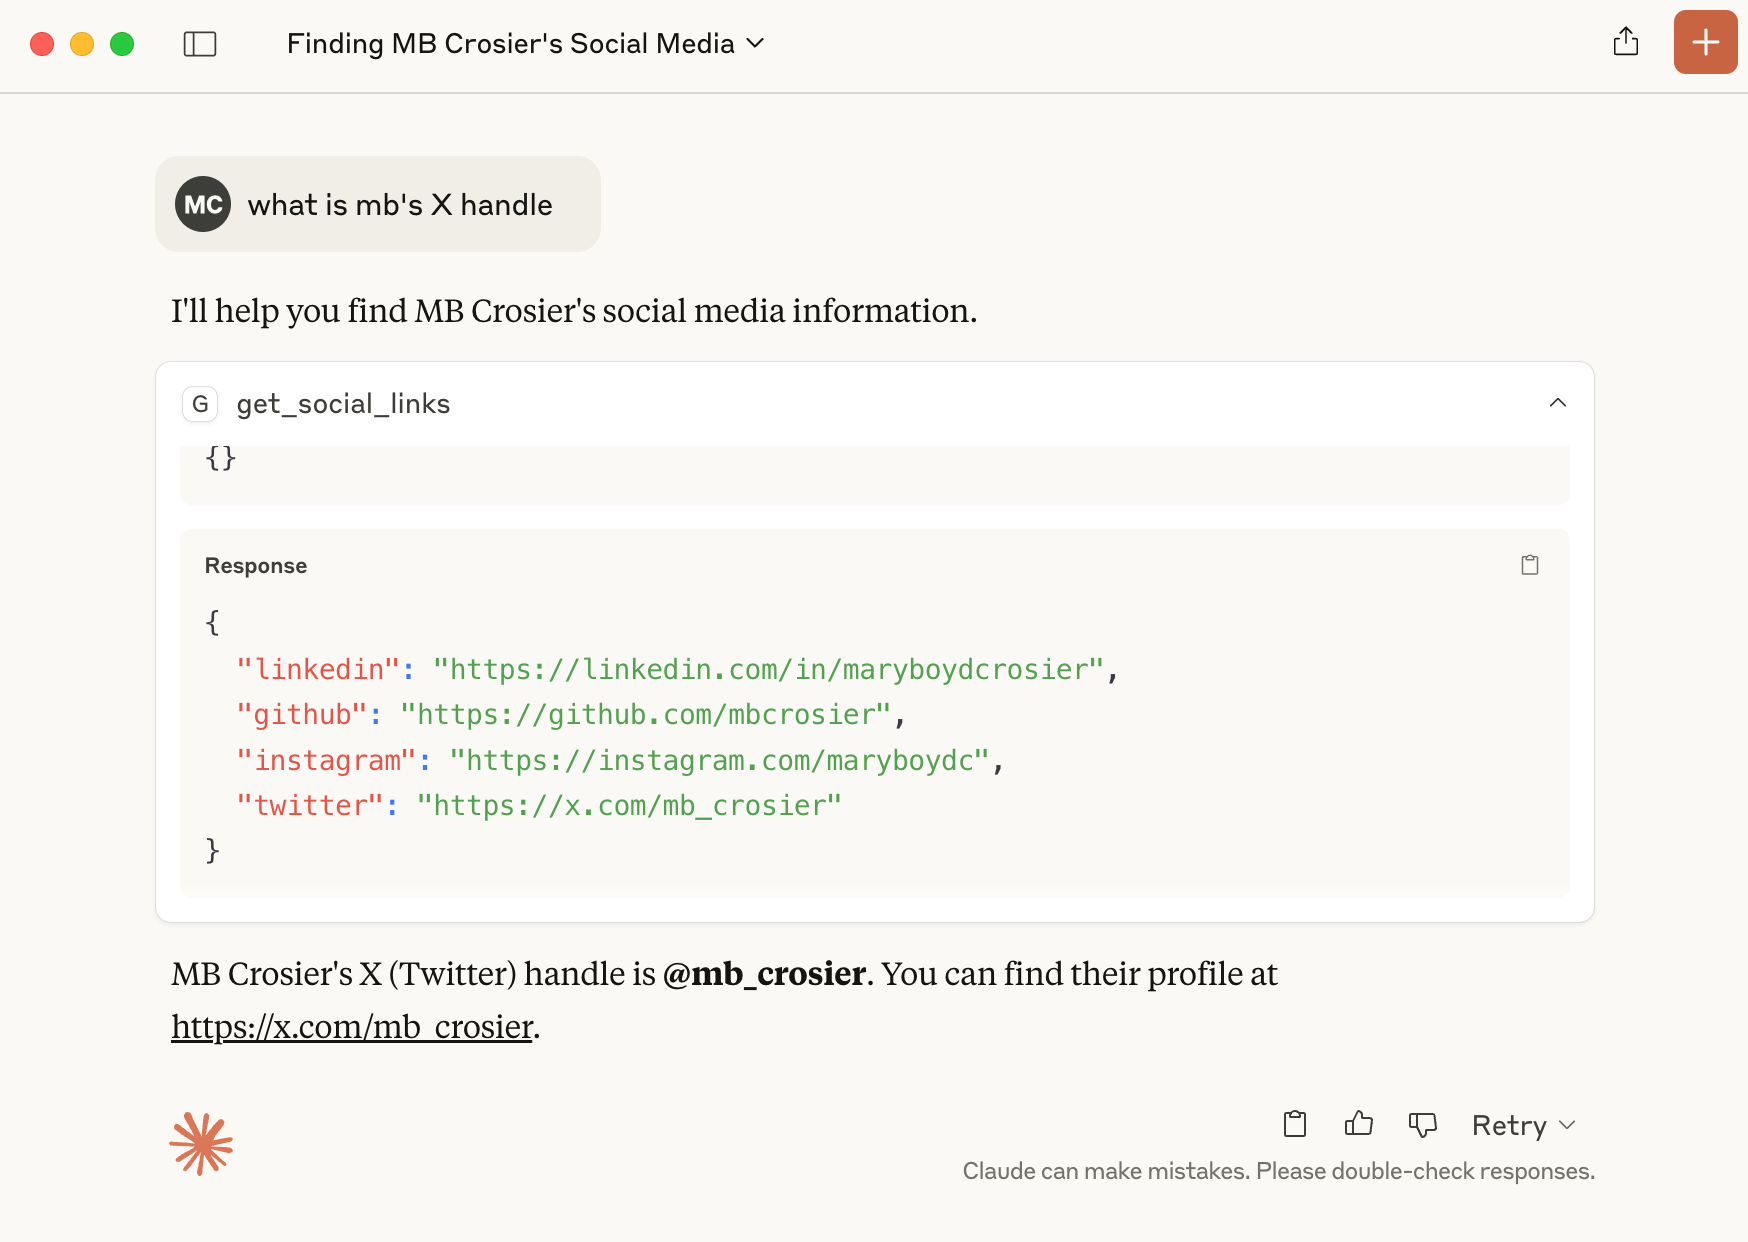
I chose this example because it demonstrates a crucial insight about how AI systems work with MCP servers: the value-add happens in the reasoning layer, not just the data retrieval.
Notice what happened here: My MCP server has a function called get_social_links that returns complete URLs, including https://x.com/mb_crosier for my Twitter profile. But when asked for my "X handle," Claude didn't just dump the full URL. Instead, it:
Identified and called the appropriate tool
Parsed the returned data
Extracted just the handle (
@mb_crosier) from the full URLPresented it in the format I actually wanted
This intelligent repackaging is where MCP servers become especially powerful. The same underlying data can be transformed and presented differently based on context—perfect for adapting a bio for LinkedIn versus Twitter, or tailoring a professional summary for different audiences.
Closing Thoughts
Realistically, personal MCP servers will likely remain a niche tool—similar to personal websites—primarily appealing to developers and entrepreneurs who want granular control over their professional narrative or an artifact to point people toward during a job search.
However, I think an MCP server for professional research feels almost inevitable. LinkedIn guards their data very, very carefully, so is unlikely to create an MCP server of their own and risk reducing traffic to their site, so this is an opportunity for a new player or even maybe for a sales intelligence platform to re-invent how we prep for calls and find new connections.
If anyone is building a “professional research MCP server”, lmk - I would love to be an early user! And until then, if you need my bio or contact info, you know where to find it!